Studio lighting transforms portrait photography from good to extraordinary. While natural light is beautiful and accessible, studio lighting gives you complete control over the direction, quality, intensity, and colour of light in every image. That control allows you to create consistent, repeatable, professional results regardless of weather, time of day, or location. A portrait photography course teaches you how to set up and modify studio lights with confidence, starting with simple one-light setups and progressing to multi-light configurations.
Why Learn Studio Lighting?
Many beginner photographers assume studio lighting is complicated and expensive. In reality, a single studio strobe or continuous LED light, a light modifier, and a backdrop are all you need to start producing professional portraits. The investment is modest, and the creative possibilities are enormous.
Studio lighting skills also set you apart in the market. Natural-light photographers are abundant; photographers who can deliver consistent, polished studio portraits are less common and can command higher rates. Corporate headshots, family portraits, beauty photography, and commercial work all benefit from controlled studio lighting, making it a versatile and valuable skill set.
A portrait photography course introduces studio lighting as an essential component of your portrait toolkit. You learn to understand light — how it behaves, how it changes with distance and modification, and how to shape it to flatter any face.
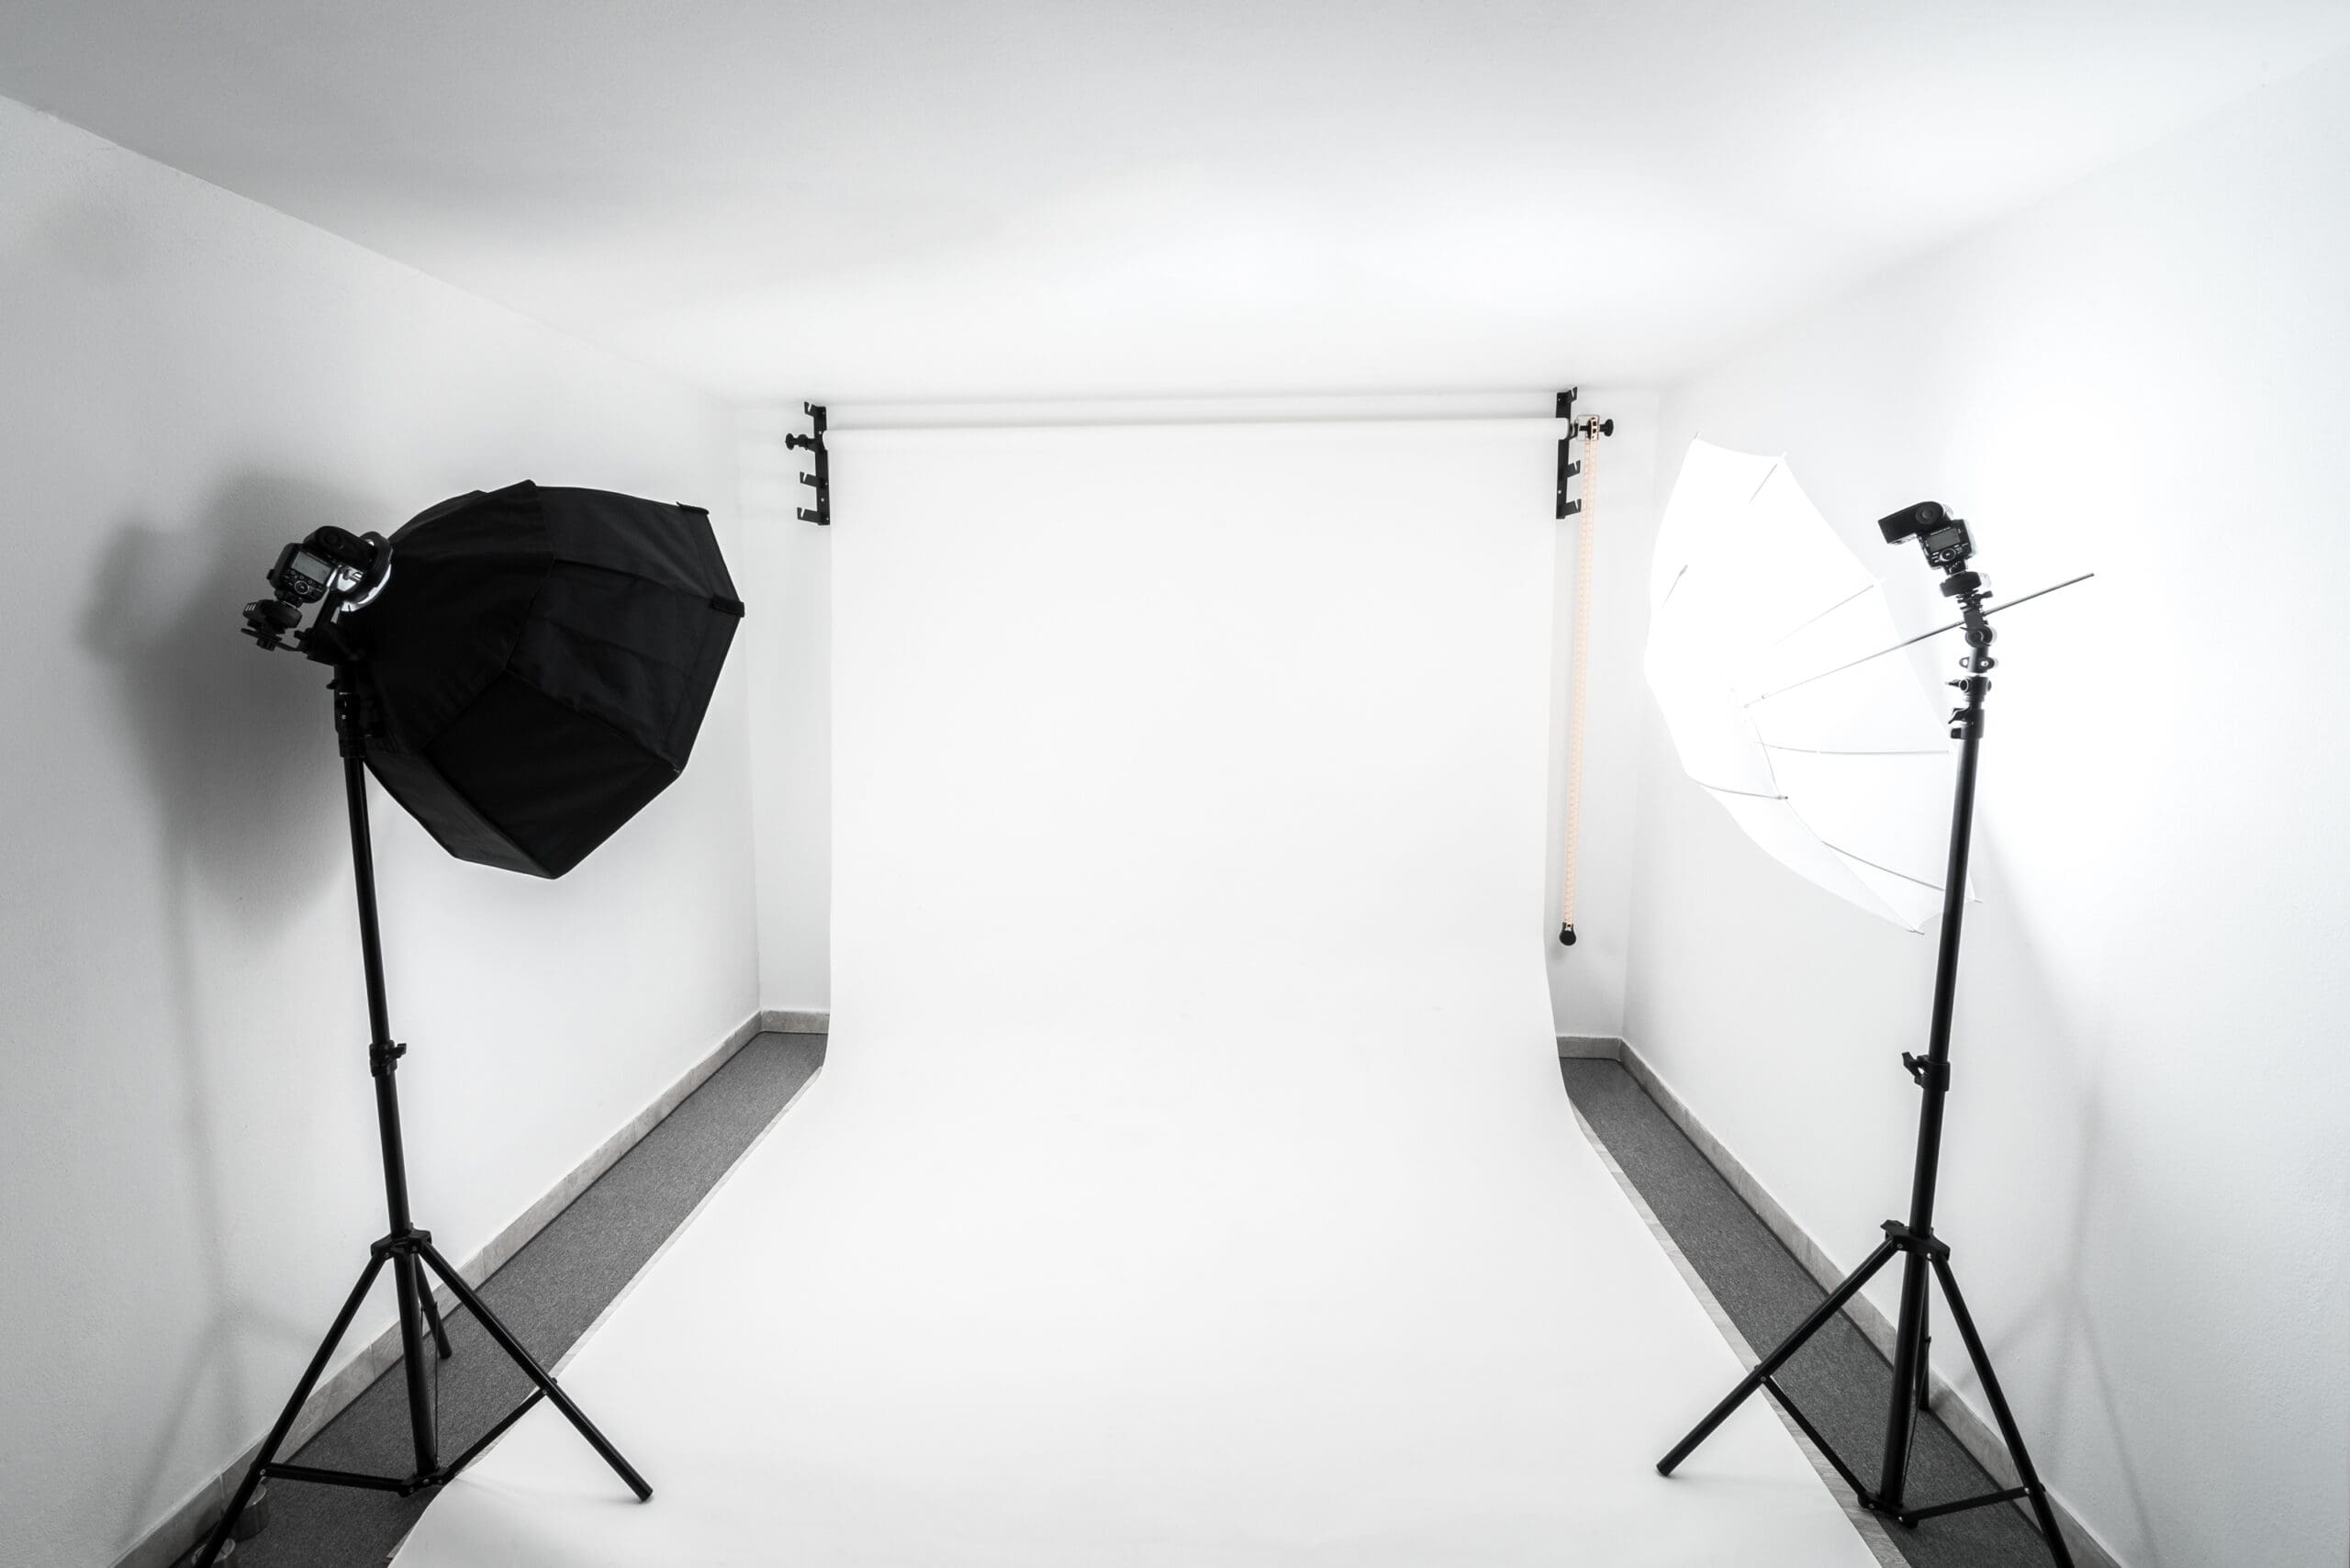
Understanding Light Modifiers
Before setting up specific configurations, you need to understand the modifiers that shape your light source. Each modifier changes the quality, direction, and spread of light in different ways.
Softboxes produce soft, diffused light with gradual shadow transitions. They come in various shapes — rectangular, square, and octagonal — and sizes. Larger softboxes produce softer light because the light source becomes relatively larger in relation to the subject. Octagonal softboxes (octa-boxes) create a natural-looking round catchlight in the subject’s eyes.
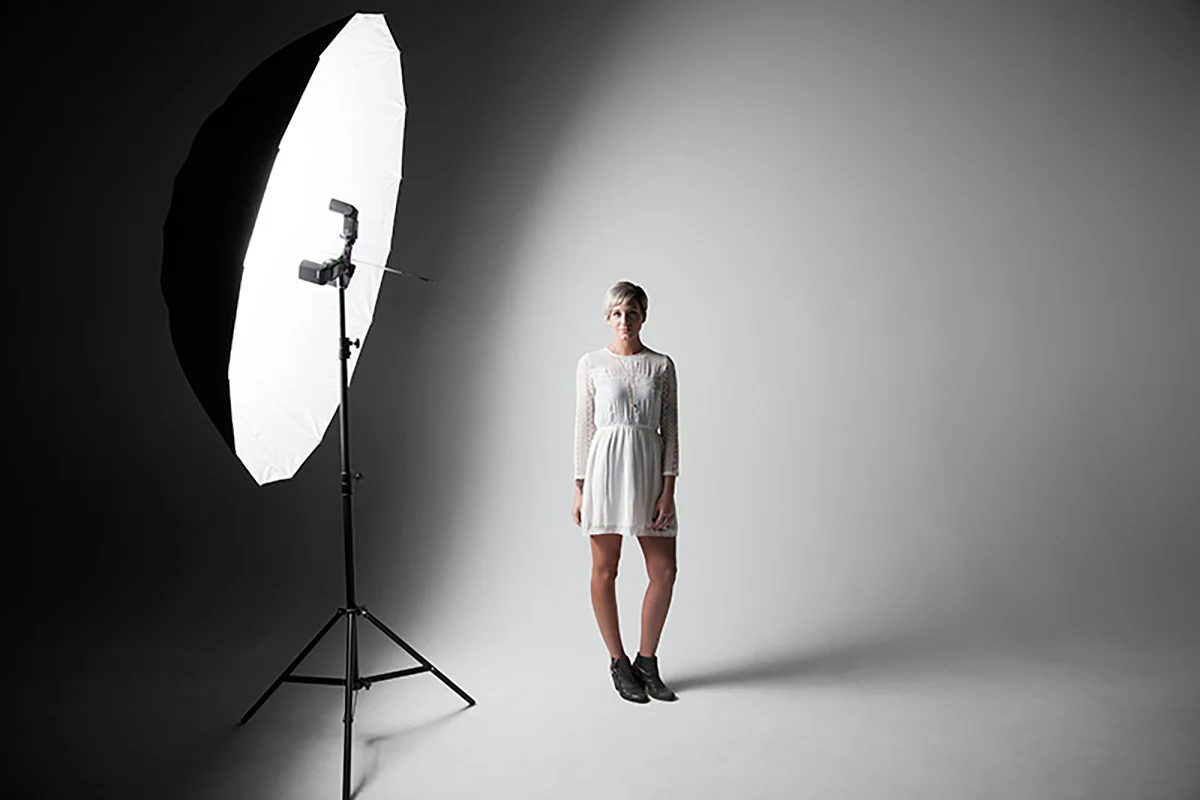
Umbrellas are the simplest and most affordable light modifiers. Shoot-through umbrellas diffuse light in a similar way to softboxes but with less control over spill. Reflective umbrellas bounce light off the interior surface and back toward the subject, producing a slightly harder quality than shoot-through models.
Beauty dishes produce a distinctive quality of light that sits between hard and soft — flattering for skin with enough contrast to create dimension. They are a favourite modifier for headshots and beauty photography.
Grids and snoots narrow the beam of light, allowing you to illuminate specific areas without spilling light elsewhere. These are useful for hair lights, accent lights, and creating dramatic, focused illumination.
A portrait photography course teaches you which modifier to choose for different portrait styles and how each one affects the final image. Understanding modifiers is essential before you can design effective lighting setups.
One-Light Setup: The Foundation
A single light source is all you need to create a wide range of portrait looks, and mastering the one-light setup is the foundation of all studio lighting. A portrait photography course starts here because every principle you learn with one light applies when you add more.
Rembrandt lighting places the light at approximately 45 degrees to the side and slightly above the subject, creating a triangle of light on the shadowed cheek. It is named after the Dutch painter who frequently used this lighting pattern and is one of the most universally flattering setups for both men and women.
Loop lighting positions the light slightly to the side and above the subject, creating a small shadow beside the nose that does not connect with the cheek shadow. Loop lighting is flattering for most face shapes and is the most commonly used pattern in professional headshot photography.
Butterfly lighting, sometimes called Paramount lighting, places the light directly in front of and above the subject, creating a small shadow beneath the nose. This setup is particularly flattering for subjects with strong cheekbones and is a classic beauty and glamour lighting pattern.
Split lighting places the light at 90 degrees to the side, illuminating exactly half the face while the other half falls into shadow. It creates dramatic, moody portraits and is often used for artistic and editorial work.
Each of these patterns can be achieved with a single light and a modifier. The only variables are the position of the light relative to the subject and the type of modifier used. Profoto’s lighting education resources provide excellent visual demonstrations of these classic patterns.
Two-Light Setup: Adding Fill and Separation
A second light introduces the ability to control shadow depth and separate your subject from the background. A portrait photography course progressively builds to two-light setups once you are comfortable with one-light patterns.
The most common two-light setup uses a main light (key light) for primary illumination and a fill light to soften the shadows created by the key. The fill light is typically placed on the opposite side of the camera from the key light and set to a lower power — one to two stops less than the key. This ratio determines the contrast of the image: a small power difference creates soft, low-contrast shadows, while a larger difference creates dramatic, high-contrast results.
Alternatively, the second light can be used as a hair light or rim light, positioned behind and above the subject to create a bright edge along the hair and shoulders. This separates the subject from the background, adds dimension, and creates a polished, professional look. Hair lights are particularly effective when photographing dark-haired subjects against dark backgrounds, where without separation, the subject would merge into the backdrop.
Three-Light Setup: Complete Control
A three-light setup gives you comprehensive control over every element of your portrait lighting: key light for primary illumination, fill light for shadow control, and hair or background light for separation and atmosphere.
Background lights illuminate the backdrop independently from the subject, allowing you to create even, graduated, or coloured backgrounds. A light aimed at a white backdrop can produce anything from pure white to dark grey depending on the power level and distance. Coloured gels on background lights can create dramatic, editorial effects.
The classic three-light portrait setup — key light with softbox at 45 degrees, fill light with umbrella at a lower power on the opposite side, and a hair light with grid behind and above the subject — is the workhorse configuration of professional portrait studios worldwide. A portrait photography course teaches you to set up this configuration efficiently and troubleshoot common issues like light spill, colour contamination, and uneven illumination.
Metering and Exposure for Studio Light
Studio lighting requires a different approach to exposure than natural light photography. A handheld light meter measures the exact amount of light reaching your subject and tells you the precise aperture setting needed for correct exposure. While not strictly essential — many photographers use their camera’s histogram and test shots to dial in exposure — a light meter streamlines the process and is the professional standard.
Your camera settings for studio work typically use manual mode with a shutter speed at or below your camera’s flash sync speed (usually 1/160 to 1/250), an aperture chosen for your desired depth of field, and ISO at its lowest native value (100 or 200) for maximum image quality. The flash power is then adjusted to deliver correct exposure at your chosen aperture. Sekonic’s guide to light metering provides detailed instruction on metering technique for studio photographers.

Building Your Home Studio
You do not need a commercial studio space to practise studio lighting. A spare room, garage, or even a living room with furniture pushed aside can serve as a temporary studio. A single strobe or continuous LED light, a modifier, a backdrop stand with a roll of seamless paper, and a few metres of clear space between the subject and the background are sufficient to create professional portraits.
As your skills and client base grow, you can invest in additional lights, modifiers, and a dedicated studio space. But the most important investment is your knowledge of how light works, and a portrait photography course provides that foundation regardless of your current setup.
Light Your Portraits Like a Professional
Studio lighting is a skill that dramatically expands your creative capabilities and professional opportunities. If you are ready to take control of light and create stunning, consistent portraits, explore the Portrait Photography Course at Australian Photography School. Learn lighting, posing, editing, and business skills from industry professionals, with a camera included in your enrolment and flexible online study options. Get in touch today and start creating portraits that stand out.